What is the Secret to a Good Croissant?
Making the perfect croissant is no small feat—it’s a dance of science, skill, and passion. This article explores the intricate journey of crafting these buttery, flaky masterpieces. From understanding their rich history to nailing the lamination process, we’ll unravel the secrets to achieving croissant perfection. You’ll discover why each step, from selecting high-quality ingredients to baking with precision, is vital. Let’s dive into the art of croissant-making, step by step, starting with its fascinating origins and anatomy.
Unveiling the Secrets to a Perfect Croissant
The Historical Journey of the Croissant
From Austrian Kipferl to French Icon
Did you know the beloved croissant isn’t originally French? This crescent-shaped delight traces its roots to the Austrian kipferl, a simpler, less layered pastry dating back centuries. It wasn’t until the 19th century that the French adapted the concept, layering it with butter to create the flaky marvel we know today. The evolution of the croissant into an iconic staple of French patisseries symbolizes the blend of cultural culinary ingenuity.
Evolution of Techniques Over Centuries
Over time, bakers gradually refined croissant-making techniques, thereby transforming a simple dough into an exquisite art form. Furthermore, with the introduction of laminating dough—a meticulous process involving repeated folding and rolling with butter—croissants eventually became synonymous with culinary sophistication. In addition, every fold carefully traps air, ultimately creating the distinct layers that beautifully define a perfect croissant.
Understanding the Anatomy of a Croissant
The Role of Flaky Layers
The hallmark of a croissant is its flakiness. Those layers? They’re the result of countless folds, achieved through meticulous laminating. When baked, steam from the butter puffs up the layers, giving the croissant its signature airy structure. Without precise folds, you might end up with something flat and unappetizing.
Importance of Buttery Flavor
Let’s be real—a croissant is only as good as its butter. Rich, high-quality butter ensures each bite melts in your mouth while delivering that unmistakable golden hue. Skimping on butter quality could mean sacrificing the decadent flavor that sets croissants apart.
Essential Ingredients and Their Impact
Selecting High-Quality Ingredients
Choosing the Right Flour
The foundation of any good croissant begins with flour, but not just any flour will do. Bakers typically opt for all-purpose or bread flour with a moderate protein content. This balance ensures enough gluten development for structure without making the pastry overly tough. Using low-quality flour? It’s like building a house with weak bricks—it’ll crumble! To achieve that melt-in-your-mouth texture, always start with premium, unbleached flour.
The Significance of European-Style Butter
Ah, butter—the heart and soul of a croissant! European-style butter, with its higher fat content and minimal water, is the golden ticket. This type of butter not only enhances the flakiness of the layers but also brings a rich, creamy flavor that lingers long after the last bite. If you’ve ever wondered why bakery croissants taste better, the secret often lies in the butter. Pro tip: Keep your butter chilled to ensure clean, even layers during lamination.
The Science Behind Yeast and Fermentation
Activating Yeast for Optimal Rise
Yeast plays a crucial role in making croissants rise to perfection. Fresh yeast or instant yeast works best, but here’s the trick: temperature control. Water that’s too hot can kill the yeast, while cold water slows the activation. Aim for lukewarm liquid to kick-start the process. Properly activated yeast creates a soft, airy dough that’s a dream to work with.
Controlling Fermentation Time and Temperature
Fermentation isn’t just about rising dough—it’s a dance of time and temperature. Slow fermentation, often in a chilled environment, allows the yeast to develop complex flavors without overproofing the dough. This step also strengthens gluten, which helps maintain those stunning layers during baking. Rushing fermentation? Your croissants could turn out flat and flavorless, and nobody wants that!
Armed with premium ingredients and an understanding of fermentation, you’re now one step closer to mastering croissants. In the next section, we’ll explore how to prepare and laminate the dough—the backbone of this iconic pastry. Don’t miss it!
Mastering the Dough Preparation
Crafting the Perfect Dough
Mixing Techniques for Gluten Development
When it comes to croissants, achieving the right dough texture is paramount. Mixing the ingredients—flour, water, yeast, sugar, and salt—in just the right way ensures optimal gluten development. Overmixing can make the dough tough, while undermixing leaves it too sticky to handle. The trick is finding that sweet spot: a smooth, elastic dough that holds its shape when stretched but isn’t overly stiff. A stand mixer can help with consistency, but hand-mixing allows for greater control.
Achieving the Ideal Dough Consistency
Ever heard the phrase “smooth as silk”? That’s precisely how your croissant dough should feel after kneading. It shouldn’t be too dry or too wet—finding balance is crucial. A slightly tacky dough works best, as it’s easier to roll out during lamination. Letting the dough rest between steps also prevents it from becoming overworked, keeping those layers light and airy.
The Art of Laminating Dough
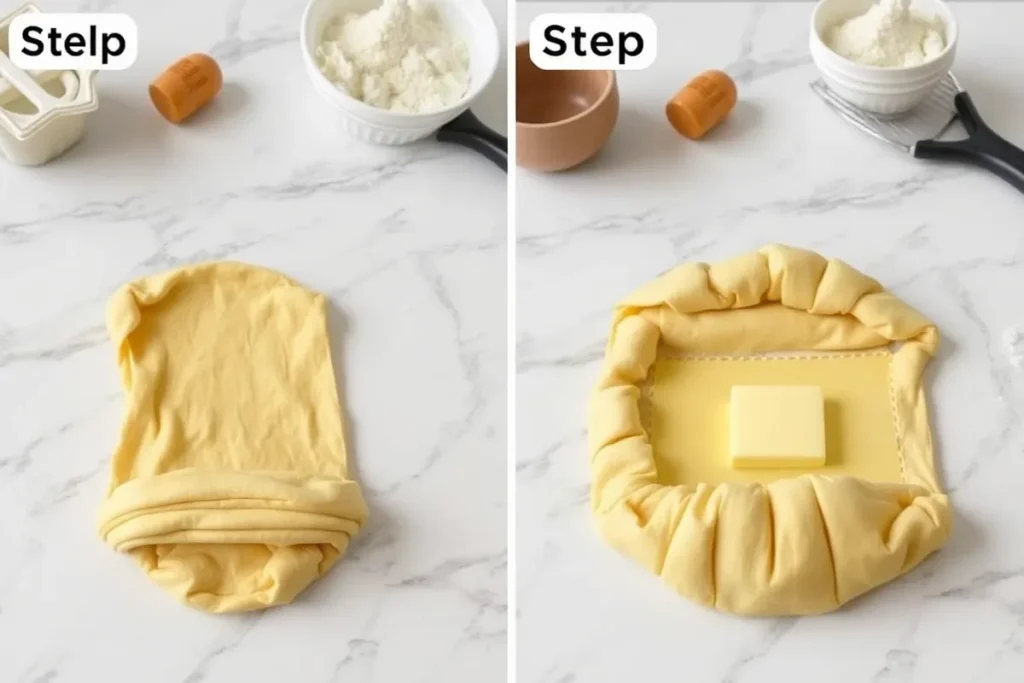
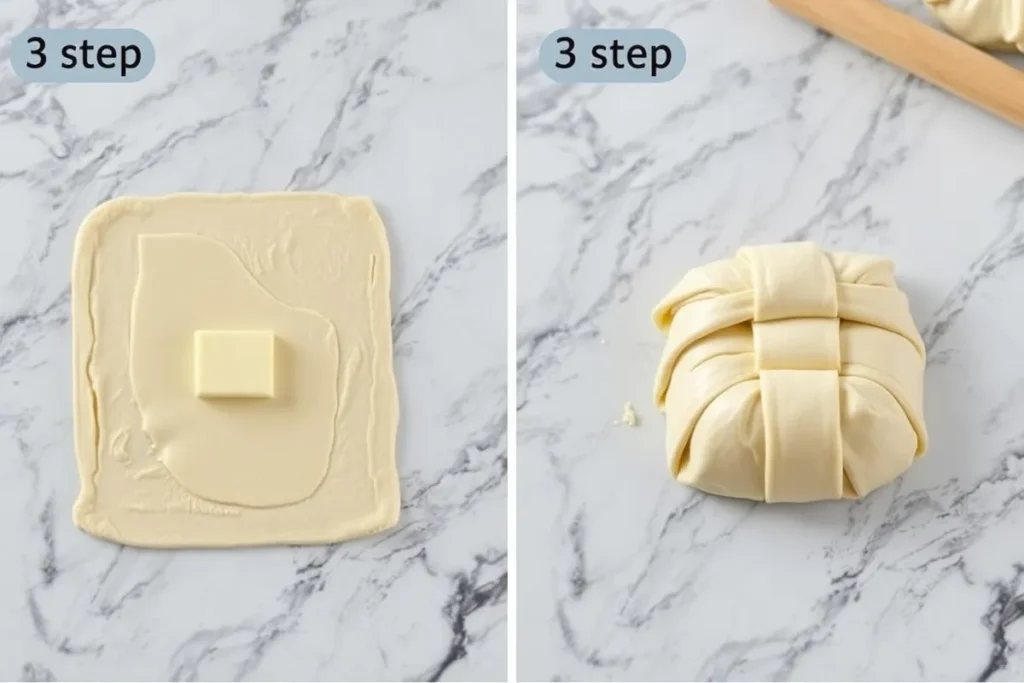
Incorporating Butter Through Folding
Here’s where the magic begins! Laminating the dough means layering it with butter to create those iconic flaky layers. Start by encasing chilled, pliable butter within the rolled-out dough. Fold it over like an envelope, ensuring the butter stays locked inside. Rolling too hard or using butter that’s too soft? Disaster! The key is gentle handling to maintain the butter’s integrity.
Creating Multiple Layers for Flakiness
To create the perfect layers, the dough is folded and rolled out several times—a process called “turns.” Each fold traps butter between the layers of dough. Typically, bakers use three to four folds, with chilling between each step to keep the butter from melting. This meticulous process produces the thin, crisp layers that define a great croissant. Skip a fold or rush the chilling? You’ll end up with a dense, doughy pastry instead of the airy treat you’re aiming for.
With a perfectly laminated dough ready, you’re on your way to crafting bakery-worthy croissants. Next, we’ll cover shaping, proofing, and baking to achieve that golden, flaky finish. Keep going—you’re almost there!
Shaping, Proofing, and Baking
Shaping Croissants with Precision
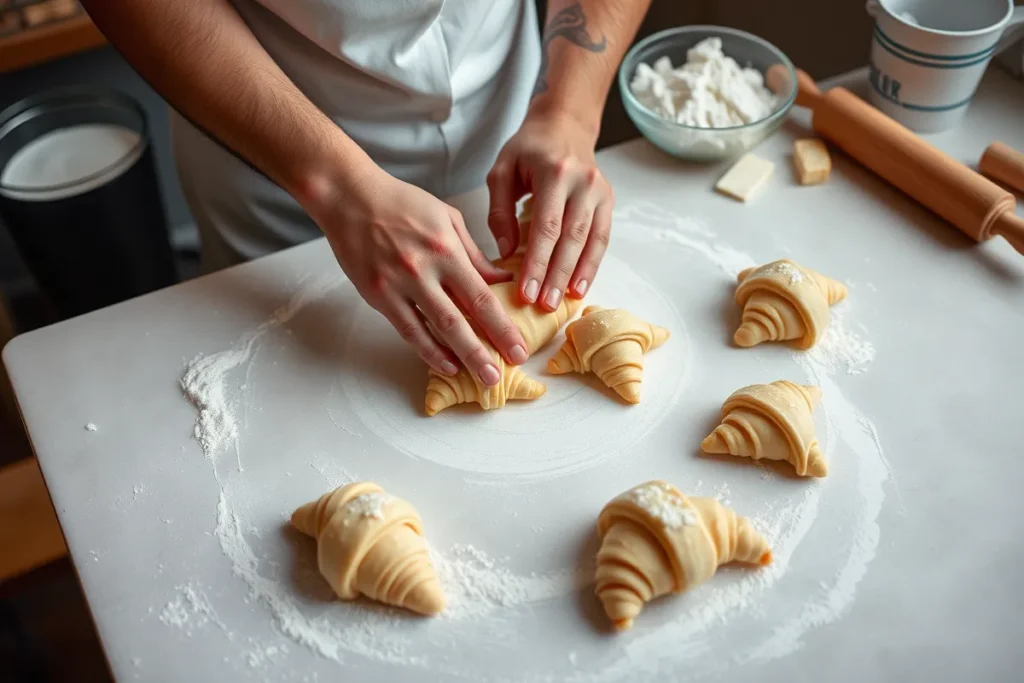
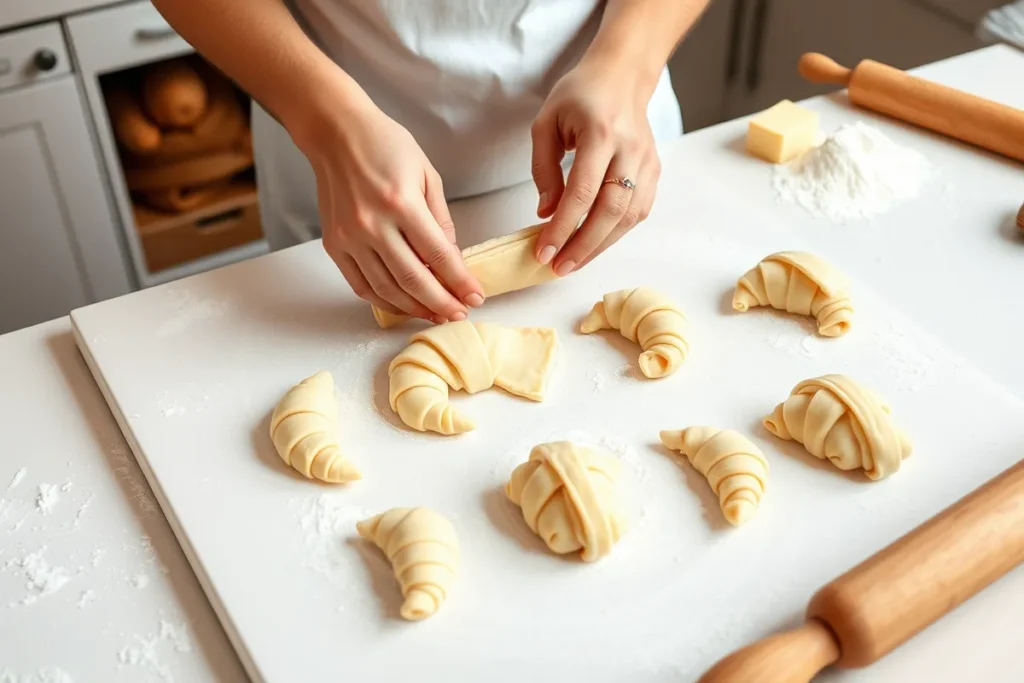
Cutting and Rolling Techniques
Shaping a croissant isn’t just about aesthetics—it affects the final texture and bake. Start by rolling your chilled dough into a large rectangle, keeping the thickness even. Using a sharp knife or pastry cutter, slice the dough into triangular pieces. Here’s the trick: cut with precision to ensure uniform shapes. For each triangle, stretch the base slightly before rolling toward the tip. This tension creates the iconic crescent shape while maintaining an even distribution of layers.
Ensuring Uniformity in Size and Shape
Consistency is key for croissants that bake evenly. Make sure each piece is the same size and rolled with the same pressure. A pastry ruler can be your best friend here! Uniformity ensures that all croissants puff up evenly during proofing and baking, avoiding mishaps like burnt tips or undercooked centers.
The Proofing Process: Timing and Environment
Ideal Proofing Conditions
Proofing is where croissants transform from flat dough to pillowy crescents. The best environment is warm but not too hot—around 75–80°F (24–27°C)—with moderate humidity. Cover the croissants with a damp cloth or plastic wrap to prevent drying out. If your proofing space is too cold, the dough may not rise properly, while overly hot conditions can cause butter to melt and leak out.
Identifying When Croissants Are Ready to Bake
Wondering how to tell if your croissants are ready for the oven? Look for visual cues: they should be about double in size and jiggle slightly when nudged. Don’t rush this step; underproofing leads to dense pastries, while overproofing can cause them to collapse during baking. Timing matters, so keep a close eye on your dough!
Baking to Golden Perfection
Oven Temperature and Timing
The moment of truth arrives when you slide those beautifully proofed croissants into the oven. A high temperature—typically 375–400°F (190–200°C)—is essential to create the initial burst of steam that makes the layers puff up. Bake for 20–25 minutes, rotating the tray halfway through for an even golden crust. Using a lower temperature? You risk losing that coveted flaky texture.
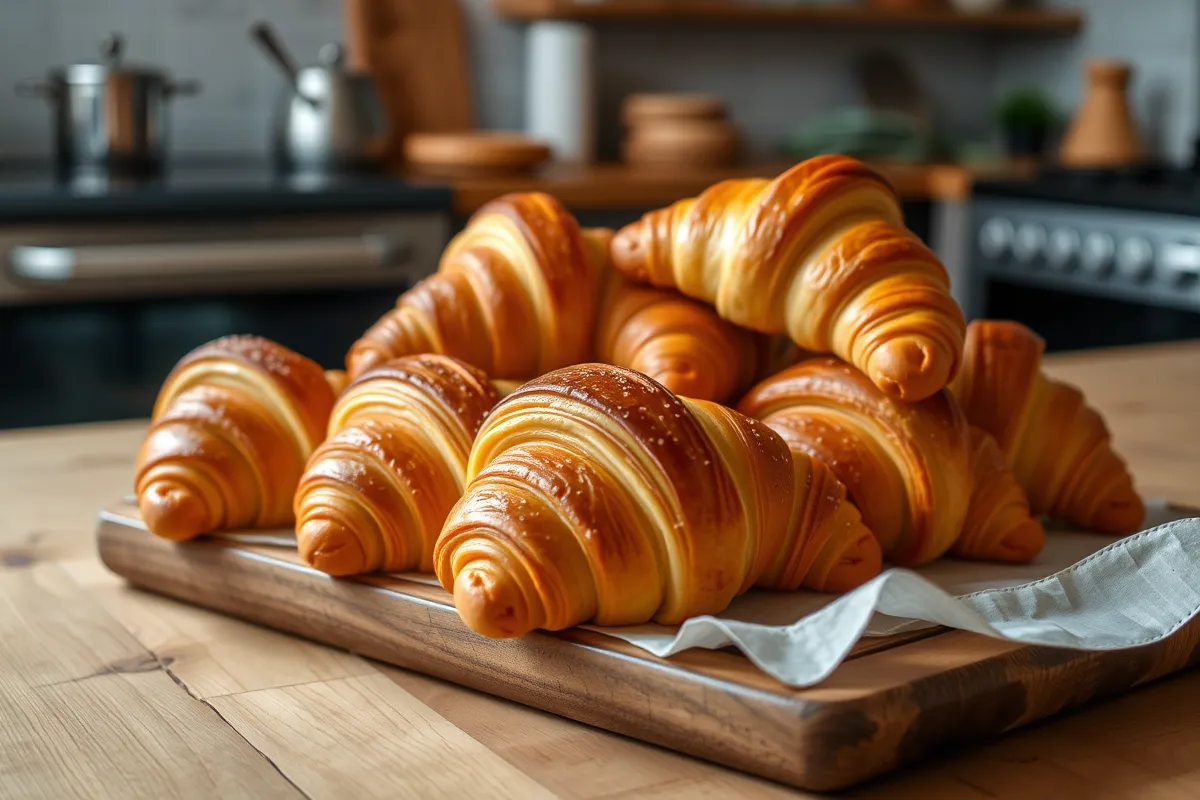
Achieving the Desired Color and Texture
Croissants are ready when they’re deeply golden and crispy on the outside but soft and airy inside. Avoid overbaking, which can dry them out. To check, gently tap the surface—it should feel firm and sound hollow. The aroma? Buttery perfection wafting through your kitchen!
With golden, flaky croissants fresh from the oven, the most challenging steps are complete. In the next section, we’ll troubleshoot common mistakes and explore solutions to perfect your technique. Stay tuned!
Common Mistakes and Troubleshooting
Avoiding Common Pitfalls in Croissant Making
Overproofing and Underproofing
Proofing is a delicate balance—get it wrong, and your croissants may fall flat, literally! Overproofed dough loses its strength, leading to deflated pastries that spread out instead of puffing up. Underproofed dough, on the other hand, results in dense and chewy croissants. The secret? Watch for visual and tactile cues. Properly proofed croissants will look plump and slightly jiggly without being too soft.
Butter Leakage During Baking
If butter leaks out during baking, it’s a sign that something went wrong during lamination. Common culprits include butter that’s too soft, uneven rolling, or insufficient chilling between folds. To fix this, ensure your butter block and dough are at similar temperatures before laminating. Keep everything cool throughout the process to maintain clean layers and lock the butter in place.
Troubleshooting Imperfections
Dense or Doughy Texture
A dense croissant is often the result of skipped folds or rushed proofing. Remember, each fold is essential for creating the signature flaky layers. If your dough feels heavy or doughy after baking, it might also be due to underdeveloped gluten during mixing. Next time, mix the dough just enough to form an elastic structure, and be patient with your laminating and proofing steps.
Uneven Layer Formation
Ever seen croissants with patchy or irregular layers? This typically happens when butter isn’t distributed evenly during lamination. Another potential issue is uneven rolling, which compresses some parts of the dough while leaving others too thick. For uniform layers, roll the dough gently and evenly, ensuring consistent pressure throughout.
Croissant-making is as much about learning from mistakes as it is about following the right steps. With these troubleshooting tips, you’ll overcome common challenges and inch closer to perfection. Next, we’ll explore creative variations and pairing ideas to elevate your croissant experience.
Enhancing Your Croissant Experience
Creative Variations and Fillings
Incorporating Chocolate, Almonds, and More
A classic croissant is undeniably delightful, but adding creative fillings takes it to the next level. For a traditional twist, try pain au chocolat, where strips of rich chocolate are rolled inside the dough. Almond croissants, filled with a sweet almond paste and topped with slivered almonds, offer a nutty indulgence. Prefer something fruity? Add a dollop of jam or custard to create a sweet surprise with every bite.
Savory Twists on the Classic Croissant
Who says croissants can’t be savory? From ham and cheese to spinach and feta, savory croissants are a versatile treat perfect for breakfast or lunch. To achieve this, layer your chosen filling on the triangular dough before rolling. Be careful not to overstuff, though—too much filling can break the layers or prevent even baking.
Pairing Croissants with Beverages
Coffee, Tea, and Beyond
Croissants pair beautifully with a warm beverage, effortlessly creating a comforting and indulgent experience. Moreover, the buttery, flaky texture perfectly complements the rich, bold flavors of coffee or, alternatively, the subtle floral notes of tea. For an added refreshing twist, you might try pairing your croissant with a glass of freshly squeezed orange juice or even a frothy hot chocolate. Ultimately, the key is to carefully balance the sweetness of the pastry with a drink that enhances its overall flavor.
Elevating Croissant Meals with Accompaniments
Transform your croissant into a meal with a few simple accompaniments. For breakfast, serve it with scrambled eggs or fresh fruit. A green salad or a hearty soup pairs wonderfully with savory croissants for lunch. Add spreads like honey, marmalade, or a dollop of whipped butter on the side for even more variety.
With these creative ideas and pairing suggestions, your croissant experience will go far beyond the ordinary. Up next, we’ll answer some of the most frequently asked questions to ensure your croissant-making journey is a complete success.
FAQs on Crafting the Perfect Croissant
What type of flour is best for croissants?
The ideal flour for croissants is a medium-protein flour, such as all-purpose or bread flour. This type strikes the perfect balance for gluten development, allowing the dough to hold its structure while remaining tender and flaky. Avoid low-protein flours, like cake flour, which can result in a lack of elasticity, or high-protein flours, which can make the croissants too chewy.
How does butter quality affect the croissant’s texture?
Butter quality is crucial in croissant-making. High-fat European-style butter is preferred because it has less water content and more fat, which contributes to the pastry’s flakiness and rich flavor. Using subpar butter can lead to a greasy, soggy texture and an uneven bake. Always opt for unsalted butter with at least 82% fat content for the best results.
What are common mistakes to avoid in croissant making?
Rushing through key steps, such as proofing, laminating, or using ingredients at improper temperatures, are common pitfalls. Butter that’s too soft can leak during baking, while overproofed dough may collapse. Another frequent mistake is uneven rolling, which can result in inconsistent layers. Attention to detail and patience are your best allies.
How can I achieve uniform layers in my croissants?
Uniform layers are achieved through precise lamination. Roll the dough evenly, keep the butter cold but pliable, and ensure the folds are consistent. Refrigerate the dough between turns to prevent the butter from melting. Avoid pressing too hard during rolling, which can merge the layers instead of keeping them distinct.
What is the ideal proofing time for croissant dough?
The proofing time can vary depending on the temperature and humidity, but typically it takes 2–3 hours in a warm (75–80°F or 24–27°C) environment. The dough should double in size and have a slight jiggle when nudged. Overproofing can deflate the layers, while underproofing leads to dense pastries.
How can I add creative fillings to my croissants?
To incorporate fillings, spread them on the triangular dough pieces before rolling. For sweet options, try chocolate, almond cream, or fruit preserves. For savory fillings, go with cheese, spinach, or smoked salmon. Be mindful of the quantity—too much filling can disrupt the lamination and leak during baking.
These FAQs cover the most pressing concerns about croissant-making, ensuring you have all the insights needed for success. With this knowledge, you’re fully equipped to tackle the art of creating perfect croissants from scratch. Bon appétit!
Unlocking the Secret to a Good Croissant
Crafting the perfect croissant is more than just following a recipe; it’s about understanding the science, respecting the process, and adding a touch of passion. From selecting the finest ingredients to mastering the art of lamination and achieving the golden bake, every step matters. Mistakes might happen along the way—dough too sticky, butter too soft—but each attempt brings you closer to perfection.
Whether you stick to the classic buttery croissant or experiment with creative fillings, the key lies in patience and precision. By applying the techniques outlined in this guide, you’ll soon produce croissants that rival those of the finest patisseries.
Let the warm, flaky layers speak for your dedication, and enjoy the satisfaction of creating something truly exceptional. The secret isn’t just in the steps; it’s in the love and care you put into every fold, roll, and bake. Happy baking!
To continue elevating your skills, explore more resources and experiment with advanced techniques. Here’s to your croissant-making journey and the delicious rewards it brings!